
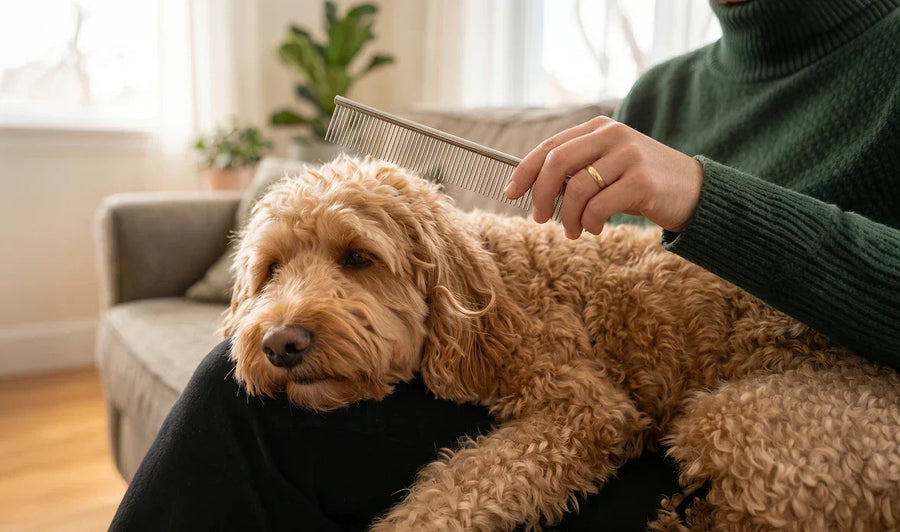

If you're a Doodle parent, you already know that grooming is a key part of keeping your dog's coat healthy and mat-free. But knowing how to comb Doodle hair properly isn't always as straightforward as it sounds. Done incorrectly, you might cause discomfort for your dog — or miss mats that later end in a costly, unwanted shave-down at the groomer.
In this step-by-step guide, we'll talk you through the right way to use the comb — and just as importantly, when. Because here's the thing most owners get wrong: the comb isn't a detangling tool. It's the final check that tells you the brushing is truly done. With a few simple tips and the right tools, combing becomes the most satisfying part of the routine — the moment you know the coat is genuinely tangle-free.
Summary
This guide explains how to keep a Doodle's coat tangle-free by brushing first with a flexible head slicker, then using the Finishing Comb to check for hidden tangles. Work the check in small sections, paying special attention to the five high-risk zones, and never force the comb through a tangle — where it catches, go back to the brush. You're done when the comb glides freely through every section. Keep sessions calm, use positive reinforcement, and maintain a regular routine to prevent stubborn mats and shave-downs.
Step 1: Choose the Right Comb for Your Doodle's Coat
Before you start, make sure you have the right tools. Doodle coats are thick, curly, or wavy — and the best comb for Doodles isn't a detangling tool at all. It's the check that confirms brushing is done, never something to drag through tangles.
Recommended Comb:
Finishing Comb — a finely-toothed metal comb that confirms brushing is done. Run it through after the slicker: if it snags, there's still a tangle, so go back to your brush for that spot and check again. Its precision makes it ideal for confirming the tricky spots — around the face, paws, and tail — where tangles hide.
👉 Pro Tip: For Doodles with thicker or denser coats, the Extra-Long Pin Slicker is the better brush for the detangling stage before the comb — its longer pins reach deeper into the coat and clear more per stroke, so there's less brushing before you're ready to check.
Step 2: Prepare Your Doodle for Combing
Before you begin, make sure your Doodle is calm and comfortable. Some dogs find grooming sessions stressful, so it's important to set the right mood.
Preparation tips:
-
Create a calm environment: choose a quiet space where you and your Doodle can relax, free of distractions.
-
Use positive reinforcement: keep treats on hand. A treat after each session helps your Doodle associate grooming with something positive.
-
Brush before combing — always. Work through the full coat first with a flexible head slicker to clear tangles and loose hair. The comb comes after brushing, never before. (For the full brushing method, see our step-by-step guide to brushing a Doodle at home.)
Step 3: Run the Comb Check
Once the coat is fully brushed, the comb check begins. This is where you find out whether the brushing genuinely reached everywhere it needed to.
Comb check technique:
-
Work in small sections: follow the same sequence you brushed — the back and legs first, then the more sensitive spots like the tummy and face. Give extra attention to the five zones where mats form fastest: behind the ears, the collar line, the legs, the tail, and the armpits.
-
Use gentle, even strokes: the comb should glide through each section without resistance. Never tug — if the comb catches, stop immediately. That snag is information, not a job for the comb.
-
Reach the undercoat: Doodles often have dense undercoats where tangles hide out of sight. Lift the coat in layers as you check, so the comb passes near the skin — not just across the surface.
Step 4: Tackle Tangles Early — With the Brush
Mats form quickly in curly and wavy coats, and every snag the comb finds is a tangle caught early — before it grows into something that needs professional help.
When the comb catches:
-
Go back to the brush: gently work the tangle with your flexible head slicker in short strokes, from the edges inward, until it clears. The comb is only ever the check — never the tool that does the detangling.
-
Don't rush: take your time and never force anything through a knot. Patience here is what keeps sessions calm and your Doodle relaxed about the next one.
-
Re-check: once you've brushed the spot through, run the comb over it again. Repeat the brush-then-comb cycle until it glides.
-
Know when to hand over: if a mat won't open up gently, consult your groomer early — catching it now is exactly how you avoid an unwanted shave-down.
Step 5: The Glide Test — Confirming You're Done
The final pass is the simplest and the most satisfying.
Run the Finishing Comb through every section one last time. The comb is your source of truth: if it glides through the whole coat without snagging — including all five high-risk zones — the coat is genuinely tangle-free. If it catches anywhere, back to the brush for that spot, then test again.
Step 6: Reward Your Doodle
Once you've finished, give your Doodle some love — a treat, a tummy rub, or extra playtime. Ending well makes grooming something to look forward to, turning it into a happy routine for both of you.
Final Thoughts: Keeping Your Doodle's Coat Healthy and Mat-Free
By making the comb check the final step of every session, you'll not only keep your Doodle's coat looking great — you'll never be surprised by a hidden mat again. The brush does the work; the comb proves it's done.
Remember: a few minutes of checking regularly saves hours of dealing with mats later — and keeps the unwanted shave-down permanently off the table.
🎁Explore our best-selling Doodle Brush tools
Stay Connected with Us:
👉 Follow our Doodle Brush Facebook Page for expert grooming tips, tutorials, and updates.
👉 Join The Tangle-Free Doodle Club , our private Facebook group for Doodle parents — share grooming stories, get tips, and take part in monthly giveaways!
Related Articles
📓Slicker Brush vs. Finishing Comb: Which One Do You Actually Need?
📓The Complete Guide to Doodle Grooming Tools (And What You Actually Need)
📓How to Brush Your Doodle at Home: A Complete Step-by-Step Guide
Q&A |
Question: Why do I need to brush before I comb, and what does each tool do?They're a two-step system with different jobs. The flexible head slicker does the work — clearing tangles and loose hair through the full depth of the coat (the Extra-Long Pin Slicker for thicker coats, where its longer pins reach deeper). The finely-toothed Finishing Comb is the truth test that comes after: it finds any hidden knots the brush missed — especially around the face, paws, tail, behind the ears, the collar line, and the armpits. The comb never detangles; it confirms the coat is truly tangle-free. Question: What's the correct technique for the comb check?Work in small sections in the same sequence you brushed, using gentle, even strokes, and lift the coat in layers so the comb passes near the skin rather than just across the surface. Pay special attention to the five high-risk zones: behind the ears, the collar line, the legs, the tail, and the armpits. Never force the comb — anywhere it catches is a job for the brush, not the comb. Question: What should I do if the comb snags or I find a mat?Stop immediately — don't pull. Go back to your slicker and gently work the tangle from the edges inward until it loosens, then re-check the area with the Finishing Comb. Repeat the brush-then-comb cycle as needed. If a mat can't be resolved gently, contact your groomer early to avoid a difficult removal or a shave-down. Question: How can I keep grooming calm and positive for my Doodle?Set up a quiet, distraction-free space and use positive reinforcement throughout. Keep treats on hand and reward your dog during and after the session so they associate grooming with something pleasant. Ending each session with praise, a treat, or play builds a stress-free routine. Question: How do I know I'm truly finished, and how often should I do this routine?You're done when the Finishing Comb glides through every section without snagging. If it catches anywhere, return to the slicker for that spot and test again. Make the comb check the final step of every brushing session — at least 3 times a week, daily for curly coats — to catch small knots early, prevent stubborn mats, and avoid shave-downs. Consistency is key. |


